Project 1: Gene Finder #
Introduction #
Computational approaches for analyzing biological data have revolutionized many subfields of biology. This impact has been so large that a new term has been coined to describe this type of interdisciplinary fusion of biology, computation, math, and statistics: bioinformatics.
In this project, you will be applying your Python and computing skills to a highly relevant present-day problem in bioinformatics: the analysis of the SARS-CoV-2 virus. You are no doubt familiar with this virus as the cause of the COVID-19 pandemic, which has been responsible for likely the most dramatic change to everyday life that we will see in our lifetimes.
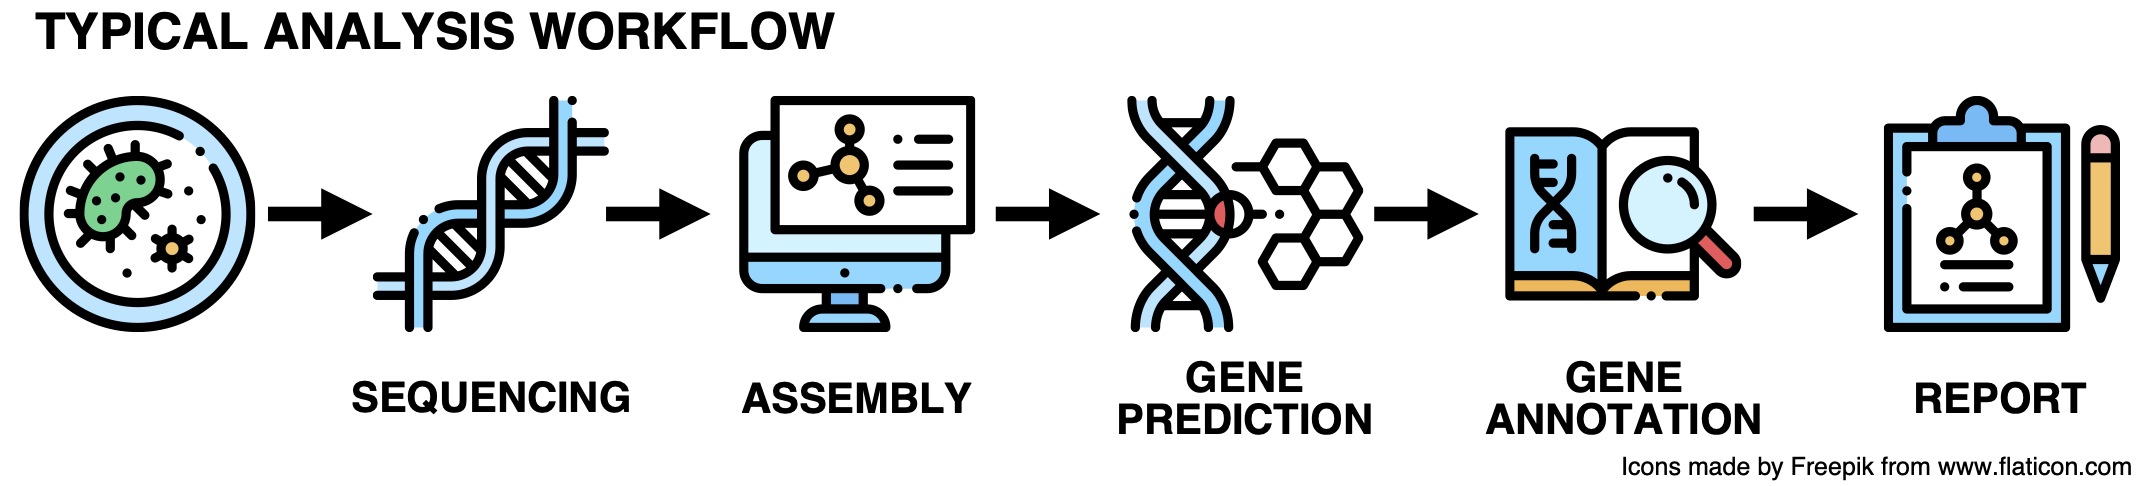
Specifically, in this project, you will write code to identify potential protein-coding genes in the SARS-CoV-2 virus, and use the protein-BLAST search engine to determine which of these genes may encode key proteins of the virus. By doing this, you will get an insight into the process that biologists use when trying to understand something like COVID-19. Specifically, the work you will do in this project roughly corresponds to the “Gene Prediction” step in the graphic below.
Gene prediction is so fundamental for the field in part because once we know where the protein-coding genes are, we can begin to decode the form and function of these proteins, and then the mechanisms that regulate the synthesis of these proteins. With a firm understanding of each of these components of the system, we gain an unprecedented level of understanding and insight into all kinds of biological processes, from infection to symptom development, and hopefully to recovery or treatment.
In this first project, you will have the opportunity to create a focused, polished piece of software with a real-world application. Because the assignments up to this point have focused much more on programming with a secondary emphasis on testing and style, we have deliberately limited the scope of implementation for this project. We hope that this will provide the opportunity to focus more on polishing your work in a way that you can present to others as a concrete sign of your learning and progress thus far in the course.
As you work through this project, we also encourage you to think about the possible uses of this technology. What can this approach to solving problems in biology achieve? What limitations does it have? How can this technology be used to benefit others, or misused to harm others?
Getting the Starter Code #
We have provided you with some starter files for this project. To get these files, visit https://github.com/olincollege/gene-finder and fork the repository to your account. (If you are visiting this page before the project kickoff, you may find that the files for this semester are not in place yet; in this case, simply wait until the project kickoff in class.) Once you have forked the repository, clone your fork of the repository to your machine. Finally, set the course version to be an upstream remote to get updates to the project files (which may not be necessary, but good to have just in case).
Project Deliverables #
There are four deliverables for this project: the implementation, unit tests, documentation, and analytical writeup. You can do them in any order you choose, though the order in which we present them below is a reasonable order in which to tackle them. This is also a potential opportunity to try out test-drive development, starting with unit testing before moving onto the implementation.
Implementation #
The file gene_finder.py contains ten functions for you to implement, all of
which are described below. You can implement them in any order you choose, but
we recommend writing them in order in which they are described below. If you do
so, you will likely find that you can write some functions much more simply by
using functions that you have implemented earlier in the project. Additionally,
the file helpers.py provides some functions and variables that may be helpful,
and we expect that you will use each function or variable in this file at least
once as you write your functions.
Each function description also states the function’s assumptions, so be sure to
read each description carefully. If it helps, you can also sneak ahead to
test_gene_finder.py, which contains a few sample test cases for most of these
functions. There, you can see what the function is expected to return for
various inputs.
1. get_complement
#
The get_complement function takes a string nucleotide consisting of a single
character A, T, C, or G, each representing the DNA nucleotides adenine,
thymine, cytosine, and guanine, respectively. The function should return a
string (also consisting of a single character) representing the complementary
nucleotide. In DNA, A and T are complementary to each other, as are C and
G.
2. get_reverse_complement
#
The get_reverse_complement function takes a string strand representing a
single strand of DNA (consisting entirely of the characters A, T, C, and
G) and returns a string representing a complementary strand of DNA.
Complementary strands of DNA run in opposite directions to one another, so this
string should be the reverse of simply taking the complement:
------------> Initial strand goes this way
ATGCCCGCTTT
|||||||||||
TACGGGCGAAA
<------------ Complementary strand goes this way
Thus in the example above, the reverse complement of ATGCCCGCTTT would be
AAAGCGGGCAT and not TACGGGCGAAA.
3. rest_of_orf
#
An open reading frame (ORF) is a sequence of nucleotides in a strand of DNA
that can be translated into a protein. An ORF begins with a start codon (the
sequence ATG) and ends with a stop codon (any of the sequences TAA, TAG,
or TGA). Finding these ORFs is a key component of identifying genes of
interest in DNA.
The rest_of_orf function takes a string strand representing a strand of DNA
that begins with a start codon and returns the sequence of nucleotides
representing the rest of the ORF, up to but not including the next stop codon.
If there is no stop codon, the function returns the entire strand. Codons in DNA
are translated three nucleotides at a time, so the stop codon must appear a
multiple of three nucleotides away from the start codon:
ATG ATA GAA TGA
As you can see, TAG appears in the sequence earlier (the 5th through 7th
nucleotides), but only one nucleotide away from the start codon. The codon TGA
appears six nucleotides away from the start codon, and is thus counted as a
valid stop codon. Thus rest_of_orf("ATGATAGAATGA") should return
"ATGATAGAA".
As a reminder, the amino_acid function in helpers.py can be used to
translate nucleotide triplets into their relevant amino acid. The stop codon’s
symbol is the asterisk (*).
4. find_all_orfs_one_frame
#
The find_all_orfs_one_frame takes a string strand representing a strand of
DNA and returns a list of strings representing all in-frame ORFs found in that
strand. “In-frame” means that each ORF should be a multiple of three nucleotides
from the start of strand. Additionally, you should not include any ORFs
completely nested in another, like this:
ATG AAA ATG GCA TGA
--------------- Include this
        ------- Not this
Assuming that you are scanning the string from left to right, you can avoid
having to check for nested ORFs as follows: once you find an ORF, skip to the
end of that ORF and continue scanning. A while loop would likely be useful for
this.
As a reminder, the amino_acid function in helpers.py can be used to
translate nucleotide triplets into their relevant amino acid. The start codon’s
symbol is M.
5. find_all_orfs
#
The find_all_orfs takes a string strand representing a strand of DNA and
returns a list of strings representing all ORFs found in that strand. This
includes not only in-frame ORFs, but also ORFs found one or two nucleotides from
the start of strand. This means you are effectively scanning triplets of
nucleotides like this:
ATG AAA ATG GCA TGA  <- In-frame
A TGA AAA TGG CAT GA  <- Frame-shifted by 1 nucleotide
AT GAA AAT GGC ATG A  <- Frame-shifted by 2 nucleotides
As with find_all_orfs_one_frame, you should avoid nested ORFs, but only
within a single frame. This means, for example, that if you find an ORF
frame-shifted by 1 nucleotide that is completely nested within an ORF found
in-frame, you should include both.
6. find_all_orfs_both_strands
#
The find_all_orfs_both_strands function takes a string strand representing a
strand of DNA and returns a list of strings representing all ORFs found in
strand or its reverse complement.
7. find_longest_orf
#
The find_longest_orf function takes a string strand representing a strand of
DNA and returns the longest ORF found in either that strand or its reverse
complement.
8. noncoding_orf_threshold
#
As you find ORFs in a strand of DNA, you may find that many of them are rather short, some being as short as just 3 or 6 nucleotides. These sequences are too short to produce any useful proteins, and should be filtered out.
One way to filter these ORFs out is to consider what ORFs you would find in a random DNA strand of this length with the same ratio of nucleotides. You can then take the longest ORF from this random strand and throw out any shorter ORFs from the original strand, with the assumption that those shorter ORFs are likely just due to chance.
However, a single random DNA strand may just happen to contain an extremely long ORF by chance, leading many of your ORFs from the original strand to be thrown out. To prevent this, you should consider many random DNA strands and find the “shortest longest” ORF (the shortest ORF out of the longest ORFs from all of the random strands you considered).
The noncoding_orf_threshold takes a string strand representing a strand of
DNA and a positive integer num_trials representing a number of trials to run.
For each of these trials, it randomly shuffles the nucleotides in strand and
finds the longest ORF in either the shuffled strand or its reverse complement.
It then keeps track of the minimum length of this value over all of the trials
and returns an integer representing this minimum length. As an example, if the
function does 5 trials and finds longest ORFs of lengths 444, 294, 429, 243, and
264 in the trials, then the function should return 243.
9. encode_amino_acids
#
Once you have identified a set of candidate ORFs of suitable length, you should determine the sequence of amino acids these ORFs encode. Each of these sequences is potentially a protein of interest in the genome, and will be a candidate for further analysis. You will start by encoding a single ORF into a sequence of amino acids.
The encode_amino_acids function takes a string orf representing a strand of
DNA that is an ORF and returns a string representing the sequence of amino
acids, with each amino acid written as its one-letter symbol. The symbols for
each amino acid are defined by the International Union of Pure and Applied
Chemistry (IUPAC), and the mapping between codons and the
amino acid symbol can be found on
Wikipedia. There is also a
convenience function in helpers.py that you can use.
It is possible that an ORF’s length will not be an exact multiple of 3, due to reading an ORF from an offset. In this case, there will be 1 or 2 nucleotides left at the end - your implementation should simply ignore these.
10. find_genes
#
Finally, it’s time to put everything together and find potential protein-coding
genes. The find_genes function takes a string path representing the location
of a file in FASTA
format.
It should do the following:
- Load the string of nucleotides from the file.
- Determine the threshold length to use as a cutoff for coding ORFs, using 1,500 trials of shuffling the nucleotide sequence.
- Find all ORFs in both strands of the sequence.
- For any ORF longer than the cutoff length, translate the ORF to a sequence of amino acids.
- Return the list of all such amino acid sequences.
As a reminder, this function should heavily utilize other functions from
helpers.py and gene_finder.py.
Once you have completed all of the above steps, your implementation is complete!
Unit Tests #
For the testing portion of this project, you should thoroughly test your implementation to ensure that it is working properly. Proper and thorough testing is an important part of developing software for others to use.
In the test_gene_finder.py file, you will find some testing code to start
from. The starter code provided in this file contains all of the code needed to
perform some initial tests on your code, but you will need to write additional
test cases.
The testing file contains a number of lists with names like
get_complement_cases. Each list contains a series of tuples, each with two
items. The name of the list up to _cases indicates which function these test
cases are for, and the two items in each tuple are a test input and the expected
output, respectively. The existing cases have a comment above them indicating
what the unit test is specifically testing for.
For each of the test case lists, add test cases to thoroughly test the function it corresponds to. Each test case must have a comment to explain what the test case is checking or why you added that test. While for some functions adding one or two test cases will suffice, for others more may be necessary. Your tests should show that you have carefully thought about the possible behavior of the function and made sure that it returns the correct value in a variety of scenarios.
You may notice that in the lists, even the last test case’s tuple has a comma
(,) after it - this is fine, and makes it easy to reorganize test cases
without having to add/delete commas in the list.
You should consider writing additional test functions where helpful. An
example of this is the test_double_complement function that we have provided
for you, which checks that taking the complement of a complement of a nucleotide
returns the original nucleotide. While you do not have to write additional test
functions for every function in gene_finder.py, you may find it helpful to do
so to thoroughly test your functions.
Note that two functions do not have unit tests for you to write:
noncoding_orf_length and find_genes. This is because both of these functions
rely on randomization and thus it is difficult to write unit tests for them that
will produce a consistent result.
Style and Documentation #
While the functions you have written in this project provides a substantial tool that you can use to analyze DNA for potential protein-coding genes, there are of course a number of other improvements and extensions that you can imagine writing in the future. To help both your future self and others who may want to use and/or extend your work, you should ensure that your code is readable and well-documented.
Code Style #
Your code, including both gene_finder.py and test_gene_finder.py, should
be written with proper style. This means that running pycodestyle on these
files should produce no output indicating a style warning or error.
Additionally, your code should use reasonably clear and precise variable names,
and if you write helper functions for any part of your code, the names of these
functions and their parameters should also be clear.
Documentation #
Each function should be well-documented. At a minimum, this means having a docstring that explains what each function does, and if applicable, the type and description of each parameter and return value. The docstring should also list any assumptions made by the function about its inputs.
As a reminder, a docstring should consist of the following:
- A one-sentence description of what the function does, written in the imperative (“Return…” instead of “Returns…”).
- If applicable, one or more paragraphs that provide more detail on what the function does, assumptions it makes about its inputs, or its behaviors in certain cases.
- A list of the function’s arguments, with each describing the argument’s type and what it represents. If both items are clear for all arguments based on the function’s one-sentence description, then this section can be omitted.
- A description of the return value’s type and what it represents. If the
function returns
Noneor the return value’s type and description are clear from the function’s one-sentence description, this section can be omitted.
Additionally, any part of your code that requires additional explanation or justification should have a line comment with the relevant details.
Analysis and Writeup #
Your writeup for this project is a document that describes the use of the code you wrote, as well a reflection on the overall project. In this case, you will be using your code to perform a simple analysis of the SARS-CoV-2 genome, and reflecting on the context and ethical implications of this line of work.
Your writeup will be in the form of a computational essay, a Jupyter notebook
that explains your analysis, along with code cells that show the code you ran
and its output. (As an example, the worksheets in this course are fairly close
in style to a computational essay.) The writeup.ipynb file has some starter
text that shows the overall structure of this essay. You will need to fill in
the essay’s title and place your name in the Author line.
Once you have done this, write two to four paragraphs to include the sections below. Even though these sections ask you to provide specific information, your writeup should reasonably flow like an essay. If your writeup simply consists of answers to the questions below with no logical flow between sections, you will not receive full credit for this deliverable.
Analysis #
Your writeup should describe the use of your code to perform a simple analysis
of the SARS-CoV-2 genome. The code portion of this analysis is relatively
straightforward - import the necessary code from gene_finder.py and use it to
read and analyze a file containing the genetic data of SARS-CoV-2. For the
purposes of this project, the file is in data/NC_045512.2.fa, which contains
the nucleotide sequence of the SARS-CoV-2 virus (specifically, the isolate
Wuhan-Hu-1 strain of the virus, which was the first to be sequenced).
Note that running the main find_genes function may take some time, as
performing the necessary shuffles to determine the noncoding ORF threshold
length can be a bit slower than the usual functions we have been writing in this
course.
Once you have identified the candidate genes (which should be shown in the output of your code cell), you should look up these genes in protein-BLAST to find information about five major proteins in the DNA sequence. These proteins are all significant because having a better understanding of these proteins can give us insights into how the virus works, as well as possible routes to treatment or a vaccine.
That being said, because this is not a biology course, we have provided a description of each of the proteins for you to find, along with a brief summary of the significance of each protein.
- Polyprotein ORF1a (or ORF1ab in some cases) is a large “precursor protein” from which many of the virus’s proteins are formed. This is done by cutting or cleaving the polyprotein at certain locations.
- The nucleocapsid protein carries the virus’s genetic material.
- The envelope protein forms part of the outer layer of the virus, and protects it from the host’s immune system as the virus travels between host cells.
- The membrane protein is also part of the outer layer of the virus, and fuses with the host cell’s membrane (the cell’s outer layer) when the virus enters the host cell.
- The spike protein binds with specific receptors on the host cell, starting the infection of the host cell. The spike protein ensures that the virus only infects the type(s) of host cells that it is suited for.
As you might imagine, these proteins are interesting because treatment or vaccination could potentially target them - for example, treatment might hinder the spike protein’s ability to bind with and infect the proper host cell, reducing the virus’s chances of infecting a person.
To find each of the proteins above, do the following:
- Look up some of the genes you found in protein-BLAST. To do this, you can copy
and paste the amino acid sequence (beginning with
M) into the Query Sequence box. Note that for some sequences, the search can take a while (but usually no more than a couple minutes). - The search results will indicate a list of potential matches. By reading the descriptions, you should be able to determine whether or not the gene matches one of the five proteins described above. For each gene matching one of the five proteins, note the accession number (the alphanumeric string in the rightmost column of the search results) and the number of amino acids in the protein (the number following “Query Length” above the search results).
- Include these results in your written analysis.
As you look through the genes you identified with your code, you may find that some of these genes do not match any of the proteins. Feel free to write about these as well for an extra-thorough analysis.
The ideal length of this section is one to two paragraphs.
Reflection #
For your reflection, write a paragraph to answer each of the following:
- What are some limitations of the code you wrote? Are there genes or proteins that you would not be able to identify using your code? (See this visual representation of the SARS-CoV-2 genome to get a better sense of the genes in the virus.) In what ways could you adapt or extend your code to address these limitations?
- Hopefully, this project has allowed you to see how gene finding has the potential to benefit others. What are some other ways besides analyzing viral or bacterial DNA in which identifying genes and proteins can benefit others? How might these techniques be used to negatively affect others, and what are some possible ways to address these risks?
Each of these prompts has multiple questions, and you do not necessarily need to answer all of them for a thorough reflection. However, your reflection should provide evidence that you have thought carefully about these questions.
Submission #
To submit your project, add, commit, and push any files that you changed to GitHub. Ensure your files are visible on GitHub by visiting the repository page and checking your files.
Barring any emergencies, there are no late days for this project. If something comes up that will prevent you from submitting the project on time, contact us as soon as possible.
Assessment and Grading #
Each of the four deliverables are worth 30 points, for a total of 120 points. While we do not provide a detailed rubric, the following gives an overview of how points may be assigned in each section.
- For the implementation, we will run a series of unit tests on each function. These functions will include the starter tests that we provided, and may also include additional tests written by the teaching team, as well as tests written by other students in the class. These tests will be used to determine the correctness of the implementation. Since there are 10 functions to implement, you can assume that each function will be worth roughly 3 points, though individual functions may be worth more or fewer points.
- For unit tests, we will consider the thoroughness of your tests, along with your written justifications for those tests. Since there are only 8 functions to write tests for, you can assume that each function will be worth roughly 3 to 4 points each.
- For style and documentation, we will consider the output of pycodestyle on your code, as well as the quality of your docstrings. Where necessary, we will also consider the quality of comments in the code itself, such as line comments for blocks or sections of the code that need further explanation.
- For the writeup, the points will roughly be divided between the analysis and reflection. In each section, we will consider the logical organization of your ideas, your thoroughness in answering the prompts, and the clarity and style of your answers.
For excellence in any or all of the categories, we may award some extra credit. Examples of work that may earn extra credit include:
- Writing an exceptionally clean implementation of a function.
- Writing a unit test that catches a particularly difficult edge case or a subtle bug in implementations, whether in other students’ implementations or in our sample solution.
- Writing particularly clear, readable, and precise docstrings or comments for either the main implementation or the unit tests.
- Having exceptionally insightful or well-written answers in the writeup.
Note that to earn extra credit, your work must truly be considered “above and beyond” the standard for the project.
Acknowledgments #
This assignment was originally created by Professors Ran Libeskind-Hadas, Eliot C. Bush, and their collaborators at Harvey Mudd College. Special thanks to Ran for allowing us to use this assignment and adapt it for this course. Thanks also to the Summer 2019 Context and Ethics team for updates to the assignment description.